Design Patterns(C#): Basic example Strategy pattern

In this example I´m going to explane the strategy pattern. With this example you can do a calculation with two numbers (-/+) and expand the number of operators (/, *, etc.).

First create a interface which defines the interface of the operator classes. For this example an operator can only calculate two values.
[code language=’c#’]
//The interface for the strategies
public interface ICalculateInterface
{
//define method
int Calculate(int value1, int value2);
}
[/code]

Next create the operators (strategies) Minus (which subtract value 2 from value 1) and Plussus (which addition value 1 with value 2). The classes need to inherit from the interface ICalculateInterface.
[code language=’c#’]
//Strategy 1: Minus
class Minus : ICalculateInterface
{
public int Calculate(int value1, int value2)
{
//define logic
return value1 – value2;
}
}

//Strategy 2: Plussus
class Plussus : ICalculateInterface
{
public int Calculate(int value1, int value2)
{
//define logic
return value1 + value2;
}
}
[/code]

At last we need to create a Client that will execute the strategy.
[code language=’c#’]
//The client
class CalculateClient
{
private ICalculateInterface calculateInterface;

//Constructor: assigns strategy to interface
public CalculateClient(ICalculateInterface strategy)
{
calculateInterface = strategy;
}

//Executes the strategy
public int Calculate(int value1, int value2)
{
return calculateInterface.Calculate(value1, value2);
}
}
[/code]

Now we have two operators (minus & plussus) and a client (CalculateClient) that can execute the operators. Let’s test the code. Create a new webapplication, console app or something else that can write output. For this example I will use a webpage.

Initialize a new CalculateClient with argument operator Minus of Plussus and Calculate two values.
[code language=’c#’]
protected void Page_Load(object sender, EventArgs e)
{
CalculateClient minusClient = new CalculateClient(new Minus());
Response.Write(“
Minus: ” + minusClient.Calculate(7, 1).ToString());

CalculateClient plusClient = new CalculateClient(new Plussus());
Response.Write(“
Plussus: ” + plusClient.Calculate(7, 1).ToString());
}
[/code]

This code will give the following output.
[code language=’html’]

Minus: 6

Plussus: 8
[/code]

The great thing about this pattern is that you can easily add new opertators (strategies) to your code.

Cheers,
Pieter

Asp.Net: Webtest trough proxy (WebTestPlugin)

The test-team came to me with a problem involving connection errors while running webtests trough the company proxy. The webrequest needed to go to the webproxy including authentication. Visual Studion 2008 doesn’t support proxy authentication out of the box, but you can create a WebTestPlugin that does the authentication for every request.

The following class inherits from WebTestPlugin and overrides the PreWebTest method. In the PreWebTest method it will authenticate the request with your credentials.

[code language=’c#’]
public class LoadTestProxyAuthentication : WebTestPlugin
{
        public override void PreWebTest(object sender, PreWebTestEventArgs e)
        {
            // Create WebProxy (enter your proxy url)
            WebProxy webProxy = new WebProxy(“ProxyAdres”);

            // Use the proxy for the webtest
            e.WebTest.WebProxy = webProxy;

            e.WebTest.PreAuthenticate = true;
            NetworkCredential proxyCredentials;

            proxyCredentials = new NetworkCredential();

            proxyCredentials.Domain = “domain”;
            proxyCredentials.UserName = “username”;
            proxyCredentials.Password = “password”;
            e.WebTest.WebProxy.Credentials = proxyCredentials;
        }
 }
[/code]

How to use the webtestplugin
Ad the class to your test project, change the credentials and proxyadres. After a build open the webtest press the ‘add  Webtest plugin’ button (on the top screenmenu), select the LoadTestProxyAuthentication and press OK. You need to add the webtestplugin for every webtest.

Now you can run your webtests trough the proxy.

Hope it helps,
Pieter

Asp.Net: keyboard sort items

As proof of concept I wanted to sort images in a Grid by keyboard. The sort logic needed to be implemented on the server. My solution for this problem is a combination of Javascript and C#.

First add following html to you .aspx. Notice that the body tag has runat=”server” and a ID.
[code language=’html’]
<body runat=”server” ID=”bodyTag”>

[/code]

Now add the following JavaScript to your page. This script will fetch all keyboard input and press the corresponding button.
[code language=’js’]

document.onkeydown = checkKeycode
function checkKeycode(e) {
var keycode;
if (window.event) keycode = window.event.keyCode;
else if (e) keycode = e.which;
switch (keycode) {
case 37:
var obj = document.getElementById(”);
obj.focus();
obj.click();
break;
case 38:
var obj = document.getElementById(”);
obj.focus();
obj.click();
break;
case 39:
var obj = document.getElementById(”);
obj.focus();
obj.click();
break;
case 40:
var obj = document.getElementById(”);
obj.focus();
obj.click();
break;
}

}

[/code]

At last we need to add the following C# code to the page.
[code language=’c#’]
protected void Page_Load(object sender, EventArgs e)
{
//Ad clientside onkeypress event to the body
bodyTag.Attributes.Add(“OnKeyPress”, “keyhandlers()”);
}

protected void DownButton_Command(object sender, CommandEventArgs e)
{
//Just for testing
clickedLabel.Text = (string)e.CommandArgument;
}
[/code]

Enjoy, Pieter

C#: Get Parent Control with Generics

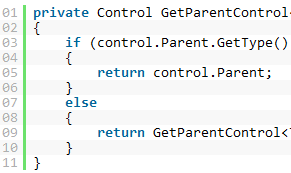
I use the following method to return a parent control of a specific type. This method is recursive and uses generics.

[code language=’c#’]
private Control GetParentControl(Control control)
{
if (control.Parent.GetType() == typeof(T1))
{
return control.Parent;
}
else
{
return GetParentControl(control.Parent);
}
}

[/code]

MemoryStream to Byte Array (Byte[])

With the following code you can convert your MemoryStream to a Byte Array.

[code language=’c#’]
//create new Bite Array
byte[] biteArray = new byte[memoryStream.Length];

//Set pointer to the beginning of the stream
memoryStream.Position = 0;

//Read the entire stream
memoryStream.Read(biteArray, 0, (int)memoryStream.Length);
[/code]

Create a Visual Studio add-in with contextmenu and selected text as input

Create a Visual Studio add-in with contextmenu and selected text as input

When working with a new way of storing settings in a database. I was frustrated how much work it was to check the value of setting from code. So I deceided to make my life a bit easier by creating a VS2008 contextmenu add-in. With this add-in I can select text within VS and use the value of the selected text within the add-in popup. The hardest part was figuring out how to create a contextmenu and how to use the selected text as input value.

In this blogpost I will show how to create a Visual Studio contextmenu add-in and pass the selected text to the pop-up. I’m not going to explain how to create an add-in you can easily find articles about this on MSDN or blogs (just try Google).

Now let’s get started. Create an new Visual Studio add-in project and add the following code to the OnConnetion Method within the Connect.cs. This code will insert add the contextmenu.

[code language=’c#’]
_applicationObject = (DTE2)application;
CommandBars cBars = (CommandBars)_applicationObject.CommandBars;

CommandBar editorCommandBar = (CommandBar)cBars[“Editor Context Menus”];
CommandBarPopup editPopUp = (CommandBarPopup)editorCommandBar.Controls[“Code Window”];

Command command = commands.AddNamedCommand2(_addInInstance,
 “GetSetting”, “Bekijk Setting”, “Executes the command for test”, true, 733, ref contextGUIDS,
 (int)vsCommandStatus.vsCommandStatusSupported + (int)vsCommandStatus.vsCommandStatusEnabled,
 (int)vsCommandStyle.vsCommandStylePictAndText,
 vsCommandControlType.vsCommandControlTypeButton);
[/code]

Then to get the selected text I use the following method within the Exec of the Connect.cs and pass the selected text (return value) to a property of a Windows Form pop-up.

[code language=’c#’]
private string GetSelection()
{
    string setting = “”;

    //Check active document
    if (_applicationObject.ActiveDocument != null)
    {
        //Get active document
        TextDocument objTextDocument = (TextDocument)_applicationObject.ActiveDocument.Object(“”);
        TextSelection objTextSelection = objTextDocument.Selection;

        if (!String.IsNullOrEmpty(objTextSelection.Text))
        {
 //Get selected text
            setting = objTextSelection.Text;
        }
    }
    return setting;
}
[/code]

Hope it helps.

Cheers,
Pieter

C#: Remove line from textfile

With the following code you can remove a line from a textfile (web.config). If the string is within a line the line will be removed.

[code language=’c#’]
string configFile = @”C:devweb.config”;
List lineList = File.ReadAllLines(configFile).ToList();
lineList = lineList.Where(x => x.IndexOf(“<!–") <= 0).ToList();
File.WriteAllLines(configFile, lineList.ToArray());

[/code]