second-brainclaudeai-agents
My AI Chief of Staff Used to Have Office Hours. Not Anymore.
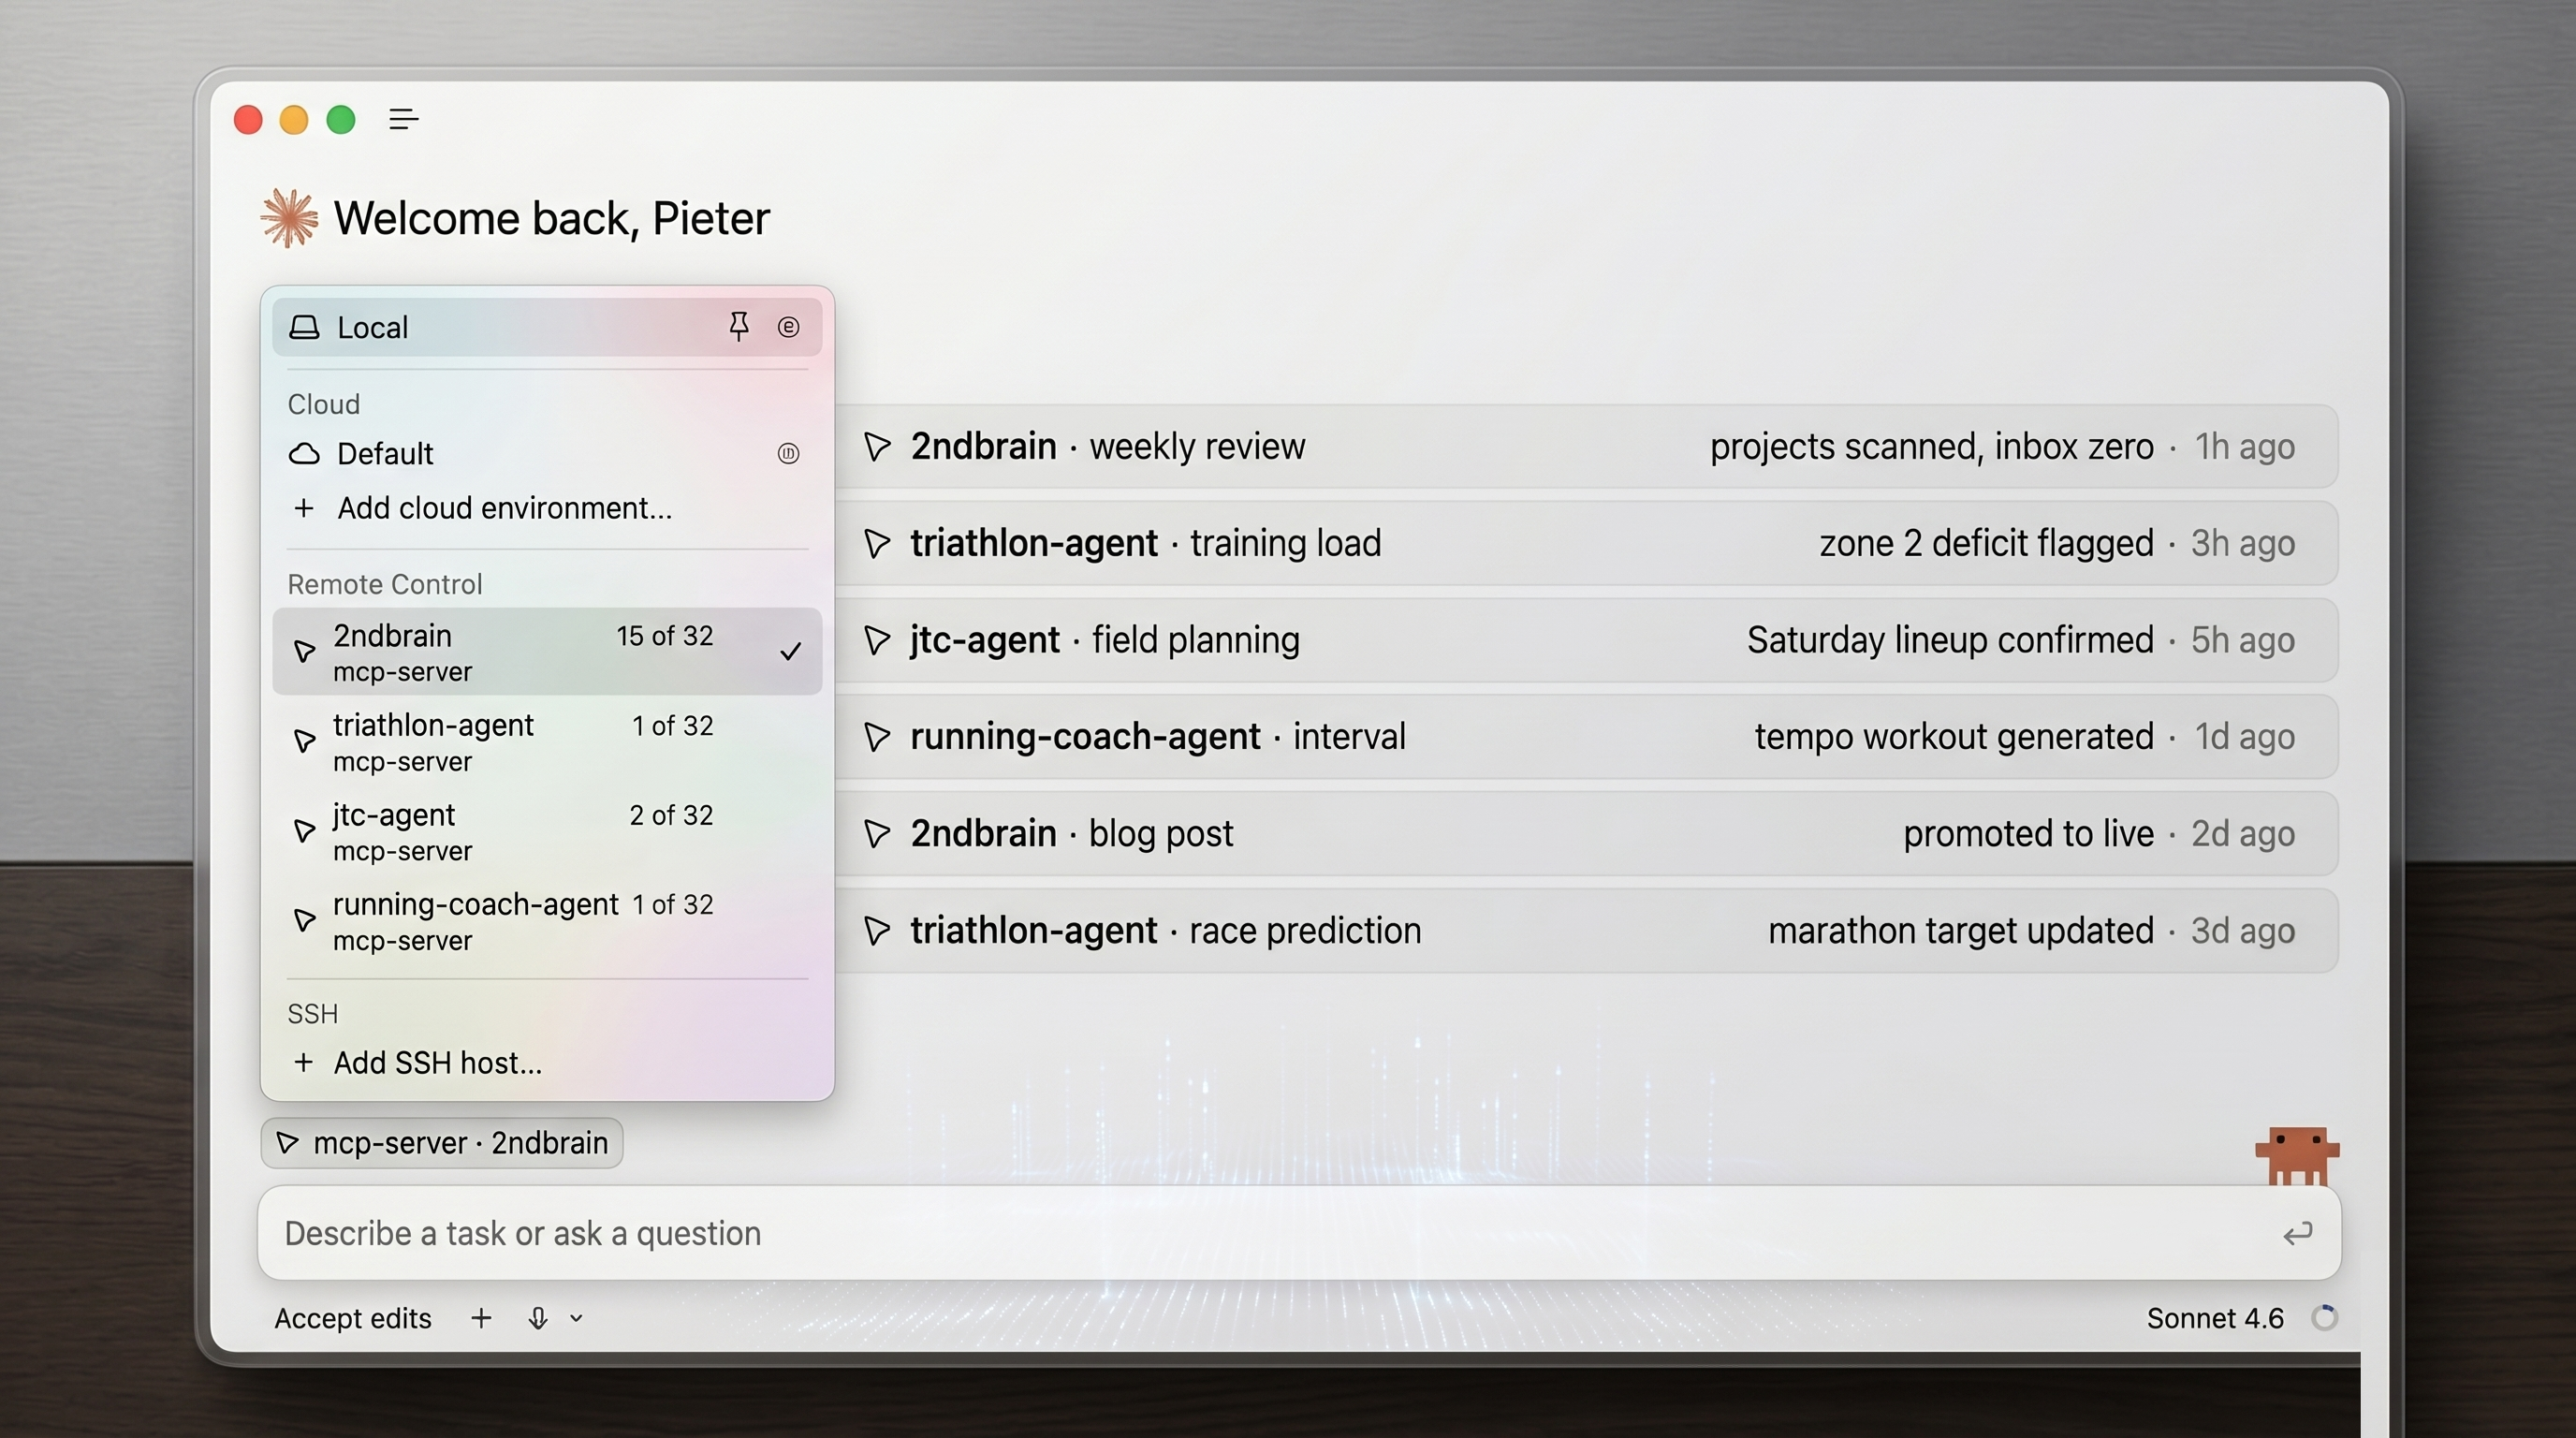
My AI chief of staff had one flaw: he only worked when my laptop was open. Here's what I built instead.
May 22, 202613 min read
How I actually use AI every day — systems, agents, and the honest failures in between.
My AI chief of staff had one flaw: he only worked when my laptop was open. Here's what I built instead.
While working with Umbraco and Sitecore I learned some Xsl tricks. The following example shows how to show the first 10 items in a HTML list.
A lot of times I need to check a statement within my LINQ query and I wish there was a possibility of a IF statement within LINQ. The following code is the…
In this example I will generate a XML site map that complies with the sitemap protocol XML schema. This example will give the following output: To keep the…
Add meta data dynamically to your page by adding a HtmlMeta control to your Header. In this example I dynamically add a keyword string to the page. You can…
In this post I will give an example how to cast a GenericList to Dictionary. This example will use the following Blogger class. The example will cast a…
The last few years I spend a lot of time working with Asp.Net AJAX. It all worked pretty good, the only downside is that you do not have control the…
You can set the culture of a report by clicking the report and setting the Language property. If you want to support multiple cultures you can set the…
By default it is not possible to use the ViewState within methods of a ObjectDataSource. Because the DataSource doesn't run within the current page instance,…
I update two posts: String formatting in C Copied the source of the post to my own blog as backup. DBML read connection string from web.config Added an…
When deploying a WCF webservice for a Silverligh application I got the following error: As you can see from the error you need to add the \ Serializable\…