This article will provide a walkthrough of how you can build a Particulate Matter Air Quality meter that integrates with your Home Assistant for under 20$, without any soldering or coding skills needed.
The sensor will provide multiple air-quality measurements directly visible in Home Assistant.
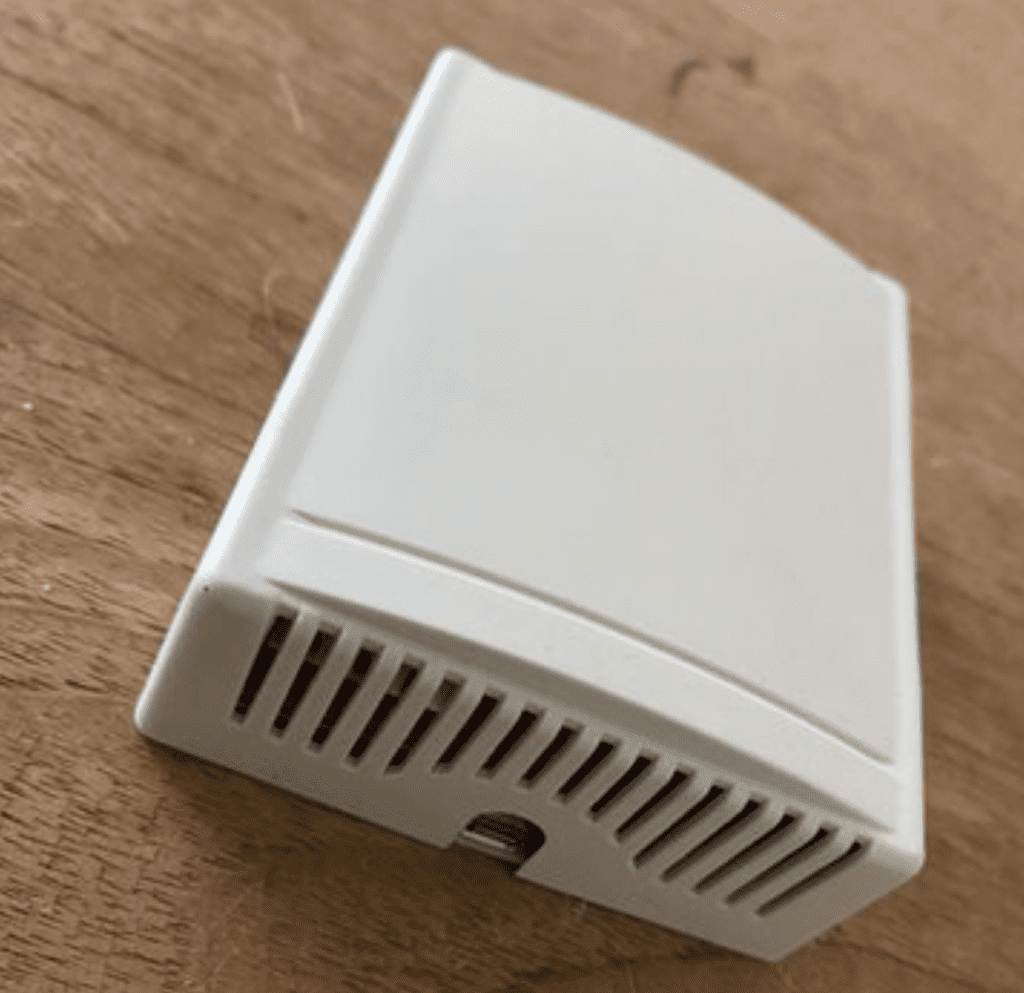
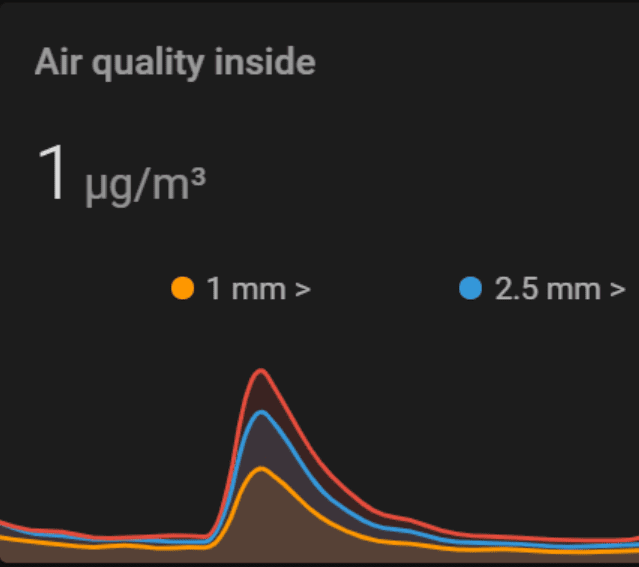
Final result: The air quality sensor and the measurements in Home Assistant
After seeing all kinds of air purifiers in the market, like the one from Xiaomi and Philips. I got interested in the topic air quality. First, I needed to learn more about how and what to measure, followed by actually measuring the air quality in my home. I don’t want to buy a air purifier if the quality of the air in my home is not bad. But how do you measure air quality?
What is a Particulate Matter sensor?
My search started with looking for a particulate matter sensor. A particulate matter sensor measures tiny particles or droplets in the air that have a specific size in microns or micrometers (µm). Like inches, meters and miles, a micron is a unit of measurement for distance. There are about 25,000 microns in an inch.
Particulate matter is the sum of all solid and liquid particles suspended in air many of which are hazardous. This complex mixture includes both organic and inorganic particles, such as dust, pollen, soot, smoke, and liquid droplets. These particles vary greatly in size, composition, and origin.
Source: www.greenfacts.org
Particulate matter (PM) is generally classified into two main size categories: PM10 and PM2.5. As an example, the particulate classified as PM2.5 is the size of 2.5 µm and would be thirty times smaller than that of a human hair.
For this solution I want to measure all the outgoing link using the Analytics Database of Sitecore Digital Marketing System (DMS). Based on this data I want to create a report in the Sitecore Engagement Analytics that will show all outgoing clicks by page. I want to create a solution that rewrites all external links within rich-text fields and General Link fields. With this solution all external links on an existing website will be automatically rewritten and measured.
In this article I will create a solution for measuring outgoing links in the following steps:
Create a processor to rewrite all external links on the website.
Let get started!
Create the processor for rewriting external links
For the rewriting of the external links we are creating a Render Field Processor. This processor will fire for every field that is rendered. During this process we will rewrite the URL.
The easiest way to create a new processor is with the Visual Studio 2010 plugin Sitecore Rocks. One of the many things Sitecore Rocks does is creating Visual Studio Templates. These templates will help you extending Sitecore. Open your solution in VS2010 and add a new item. In the dialog window go to Sitecore –> Pipelines en selecteer Render Field Processor. Name the processor ExternalUrlReWriterProcessor.cs and click Add.
The Render Field Processor Template will generate two files for you; the ExternalUrlReWriterProcessor.cs and a ExternalUrlReWriterProcessor.config.
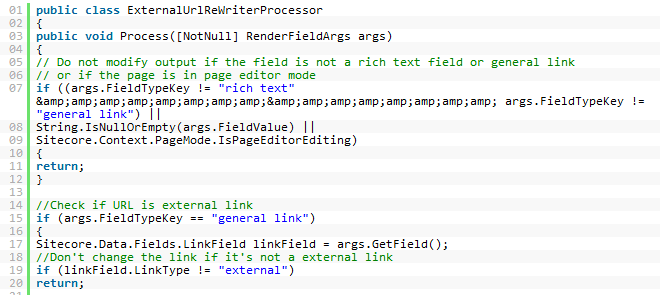
Modify the ExternalUrlReWriterProcessor class that all external URLs are rewritten to out /link.aspx page that we are going to create next. Below is my POC code. Please take notice of the comments and the TODO comments.
[code language=”csharp”]
public class ExternalUrlReWriterProcessor
{
public void Process([NotNull] RenderFieldArgs args)
{
// Do not modify output if the field is not a rich text field or general link
// or if the page is in page editor mode
if ((args.FieldTypeKey != “rich text” && args.FieldTypeKey != “general link”) ||
String.IsNullOrEmpty(args.FieldValue) ||
Sitecore.Context.PageMode.IsPageEditorEditing)
{
return;
}
//Check if URL is external link
if (args.FieldTypeKey == “general link”)
{
Sitecore.Data.Fields.LinkField linkField = args.GetField();
//Don’t change the link if it’s not a external link
if (linkField.LinkType != “external”)
return;
}
string fieldValue = args.Result.FirstPart;
string changedUrl = Regex.Replace(fieldValue, @”href=””(.*?)”””, delegate(Match match)
{
//Regex definition to check if URL contains HTTP or HTTPS (so it’s an external link)
Regex rgxExternal = new Regex(@”Regex rgxExternal = new Regex(@”(((http(s?))\://){1}\S+)”);”);
string orriginalUrl = match.Groups[1].Value.ToString();
if (rgxExternal.IsMatch(orriginalUrl))
{
//Rewrite the url to the redirect item
//TODO: Make the path configurable
return @”href=””/link.aspx?url=” + orriginalUrl + @””””;
}
return match.Value;
}, RegexOptions.Compiled);
args.Result.FirstPart = changedUrl;
}
}
[/code]
If you check your website all external links will be rewritten to /link.aspx?url=[EXTERNAL LINK]. Now let’s create the links.aspx and save the outgoing link information to the DMS Analytics database.
Test if it works
You can test if the solution is working on your website by testing the following functionalities
Action
Expected result
Create a internal link in a rich-text field
The link is not rewritten.
Create a external link in a rich-text field
The link is rewritten to /link.aspx?url=[THE LINK]
Create a internal link in a general link field
The link is not rewritten.
Create a external link in a general link field
The link is rewritten to /link.aspx?url=[THE LINK]
Click a external URL
The visitor is redirected to the external website.
In this post I will extend the basic e-mail template for Sitecore ECM with a title and text listing. With this e-mail template the business user can create new Title and Text items within the page-editor (Sitecore 6.4 and higher) or the content-editor (all versions of Sitecore). This article is a follow-up article of the Sitecore ECM: How to create a Email template from Scratch – Part I.
Create the Newsletter Text template
Createa template Newsletter Text with the following fields: Message Title and Message Text.
Add standard values for the Message Title and Message Text fields.
Add Newsletter Text folder to the Branche Template
Go to the BasicNewletter branche template and create a folder Newsletter Text. Assign the Newsletter Text template as Insert option.
Create Newsletter Text rendering
Create a new layout called Newsletter Text and copythe following code.
In this post I will create a e-mail template for ECM from scratch. This article is based on a Webinar (in Dutch) I did about the Email Campaign Manager (ECM) you can see the Webinar on YouTube.
[youtube]hGmzaK79cvI[/youtube]
We build a custom template the same way that we build a page. First we will create the templates, than we will create the presentation components and at the end we will bind the presentation components to the template standard values. Let’s start building!
Create Basic Newsletter template
1. Open the template manager and create a new template called Basic Newsletter, Select the following base templates
/sitecore/templates/Modules/Email Campaign/Messages/Inner Content/Message Root
2. Specify the following fields :
a. Title
b. Text, set the source property to /sitecore/system/Settings/Html Editor Profiles/ Message Content
c. Header Text
d. Header Link Text
e. Footer Text
The Basic Newsletter template in will look like this:
1. Create a branch template
2. Select the /sitecore/templates/Modules/Email Campaign/Messages/Pre-existing page template
3. Rename the create Pre-exiting Page branche template to Basic NewsLetter
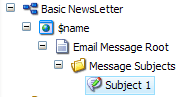
4. Underneath the $name item create the Email Message root item based on the Basic newsletter template
5. Underneath the created Email Message root item insert a folder called Message Subjects. This folder will contain all subjects for the e-mail.
6. Remove the folder template to insert options of the Message Subject folder and add the Subject template: /sitecore/templates/Modules/Email Campaign/Messages/Inner Content/Newsletter/Subject.
7. Insert a Subject item in the Message Subject folder with the name Subject 1.