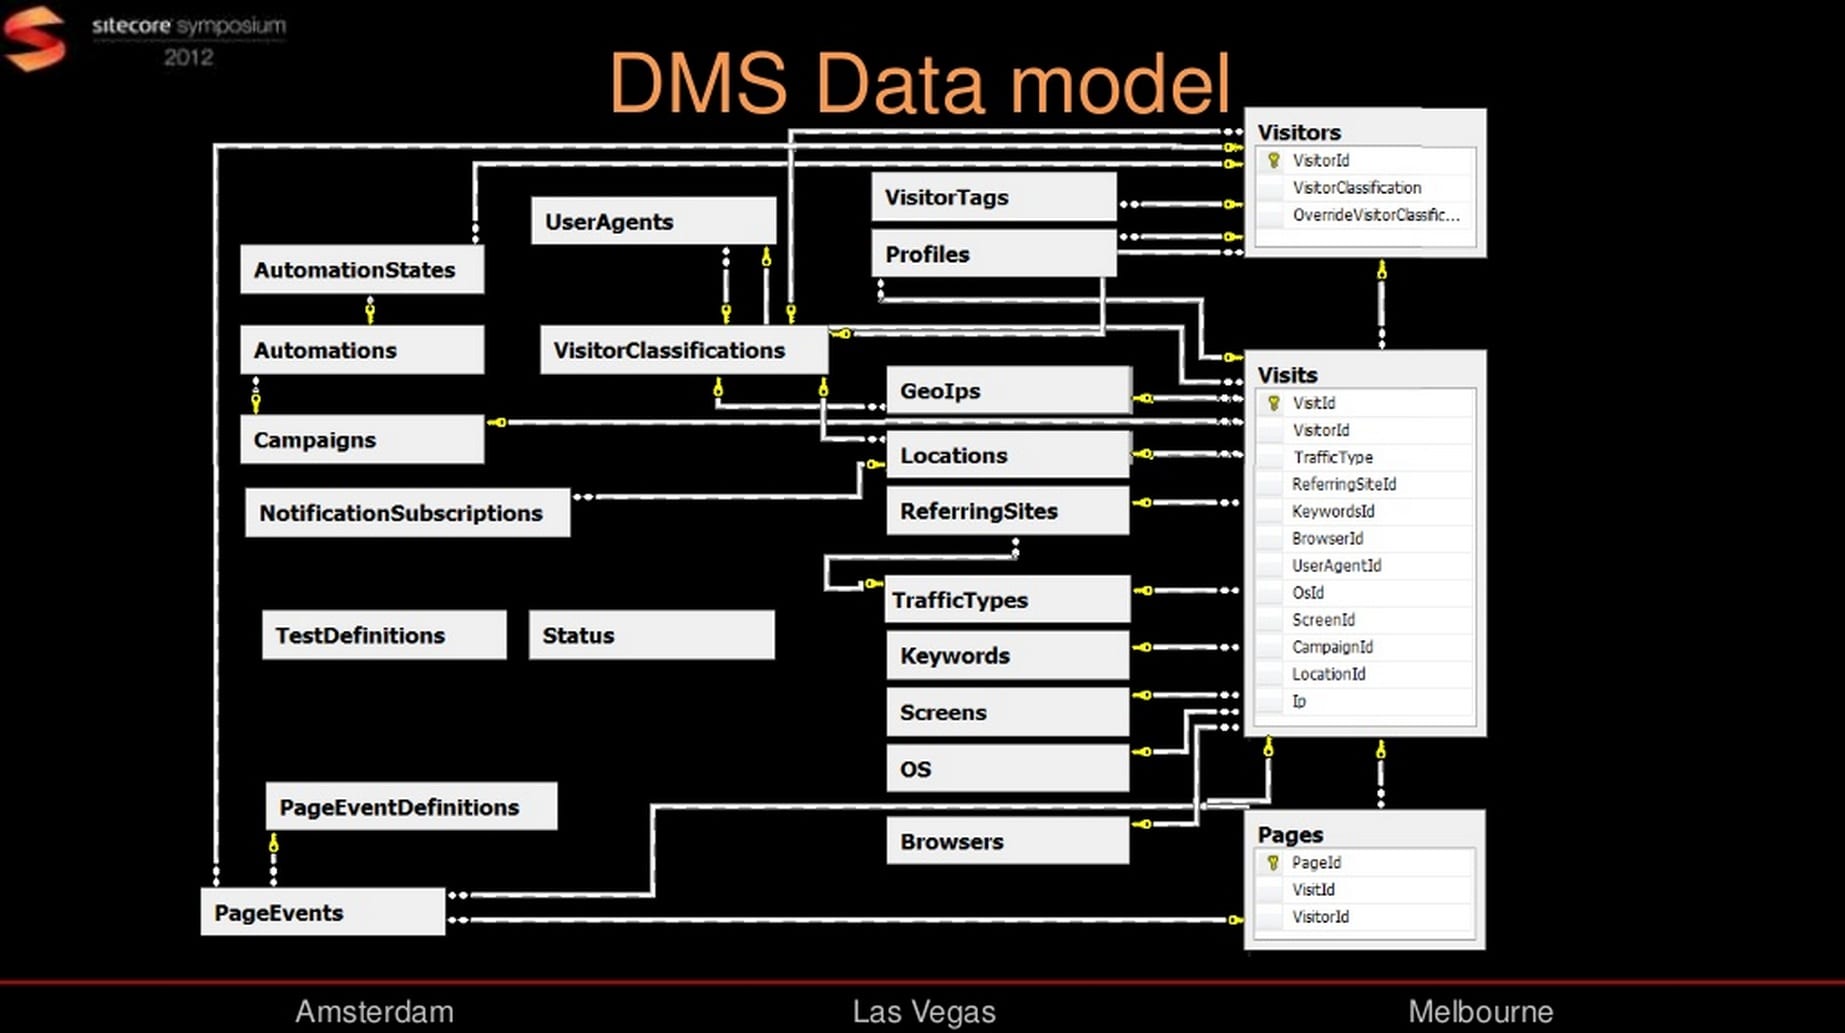
For my presentation about the DMS datamodel I created a great amount of slides. I didn’t have time to show all the slides because I only had about 60 minutes to do the talk. I uploaded the complete slidedeck to Slideshare including additional slides about Profiling and Automation.
The complete session has been recorded and will be shared after the Symposium.
Thanks for attending the session and for the great questions. Hope you have enjoyed the session. If you have any feedback or questions about the slides or the session you can leave a comment below.
As Solution Architect a part of my job is doing product demo’s and building Proof Of Concepts. The best way for me is to build stuff based on a clean install of Sitecore with the involved modules installed (like DMS, SES or ECM). Normally you will do this with the default Sitecore installer and manually install the modules you need, but this will take to much of your precious time.
With the SitecoreInstaller you can install Sitecore with selected modules in one click.
How to use the Sitecore Installer?
There are two things you need to do for the SitecoreInstaller:
Create the build library
Download and configure the SitecoreInstaller
Create the build library
The build library is where the tool stores files needed for installation such as Sitecore versions, licenses and modules. And has the following structure:
Extract the .zip and open the SitecoreInstaller.exe
First time a configuration wizard will open, insert your SQL credentials
Next step is to select your Build Library folder.
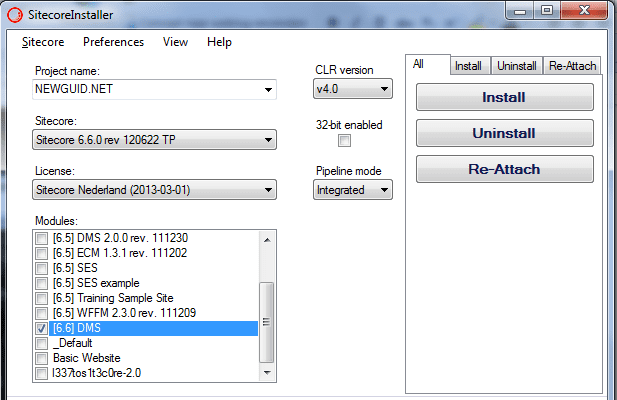
Run the SitecoreInstaller
By default the SitecoreInstaller runs in a “User friendly” mode, with wizard functionality.
I’m not that fan of the wizard. But locally you can set the Installer in a more advance mode by selecting View –> Use Developer layout and View –> Show Advanced View.
This will give you a great all-in-one interface. Where you can give your install a name, select the CMS version and modules and install with one click.
All credits go to Rasmus Rasmussen for creating and sharing this great tool!
This article is based on a Dutch webinar that I presented august 2012 and will refer to the video recording, slides, the How to documentation and used resources.
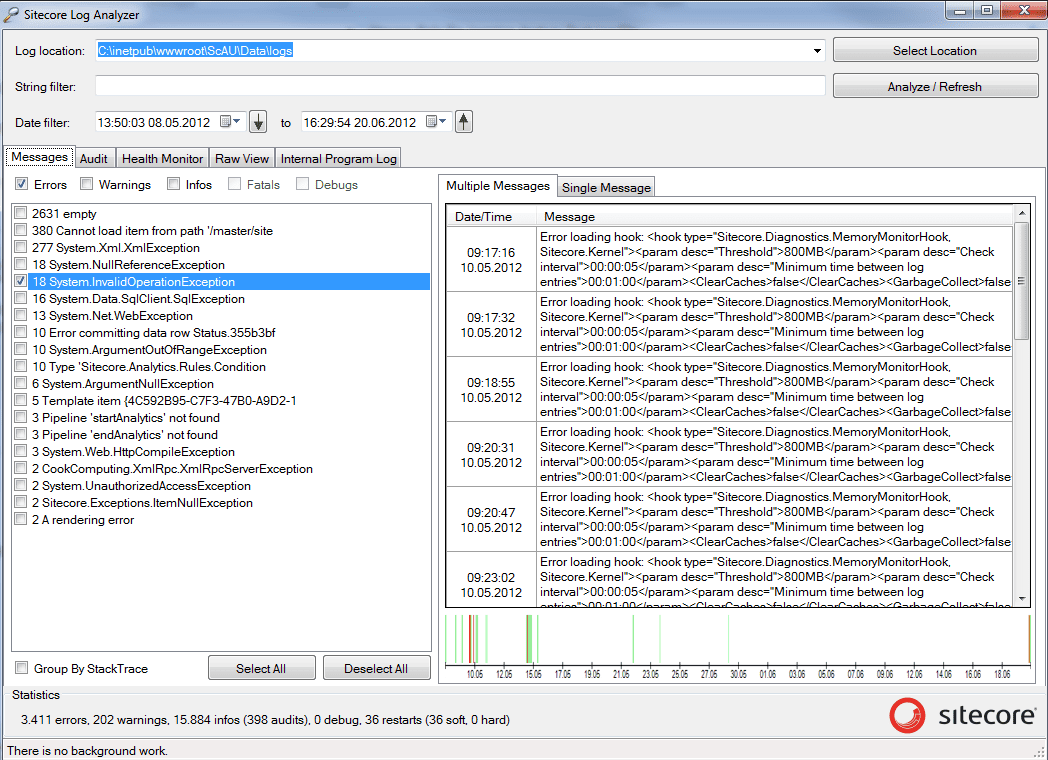
Did you hear of the Sitecore Log Analyzer? The Sitecore Log Analyzer is a great tool. It does what the name claims; It will help you analyze your log files!
A short list of some great features:
Quick analyze of all log files in a directory
Date and string filter
Tabs for the different categories; Messages, Audit and Health Monitor
Filters for log levels; Errors, Warnings and Info’s
In Sitecore you can personalize your website with conditions and actions using the Rules Engine (so called Conditional Rendering rules). In Sitecore 6.5 the interface for defining conditional rendering rules is integrated in to the page-editor, this way it´s easier for the marketeer to create and maintain pesonalization rules.
But as a developer you want to create predefined rules and activate them on the template standard values, the same way personalisation was working in Sitecore 6.4. This is still posible with 6.5 only by default the Personalisation section of the presentation component properties is hidden in Sitecore 6.5.
The following steps will enable the Personalisation section in the Presentation Component Properties dialog window.
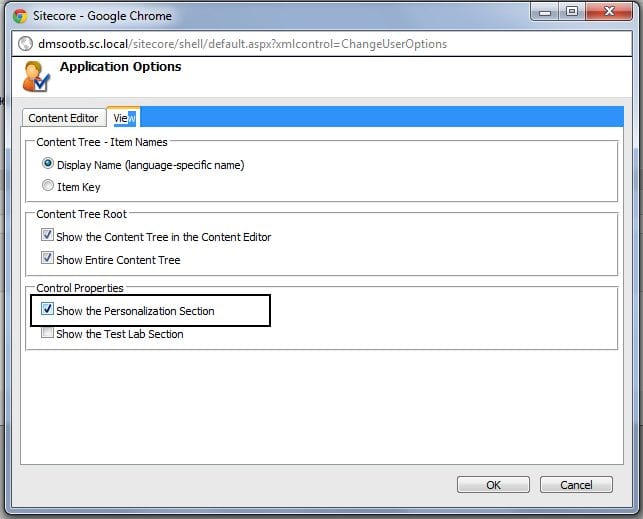
Open the Content Editor, press the Sitecore Logo button on the top left and select Application Options.
In the Application Options dialog window go to the View tab. Underneath the Control Properties section, tick the checkbox Show Personalization Section and press Ok.
That´s it! The Personalization Section will be visible again.
With this test we want to check what Sitecore DMS does with Wildcards. How are Wildcard URL’s and shown on the Analytics Reports?
Wildcard items in Sitecore are a convenient way to handle dynamic URLs. They let you pass data through the URL instead of relying on query string values that are appended to the URL. More information about the Wildcards and a introduction to the Wildcard Shared Source Module can be found in this article (written by Adam Conn).
Creating a testing environment
For this testing environment I’ve installed the shared source Wildcard module. After installing the module I opened the Content Editor and created a ‘products’ item, underneath the products item I created a wildcard item (*).
Configure the Wildcard Module
Go to /sitecore/system/Modules/Wildcards/. Create a new token called ‘Product Detail’ in the Tokens folder. And create the a new route called ‘Product Route’ within the Routes folder. In the Product Route item add the Wildcard item (*) to the Items field and define the rule in the Rules field.
The Wildcard module comes with two Sublayouts; DisplayDynamicUrls and DisplayTokenValues. For this test we are going to use the DisplayDynamicUrls sublayout. We need to alter the GetSampleData() method in DisplayDynamicUrls.ascx.cs. Open the DisplayDynamicUrls.ascx.cs and navigate to the GetSampleData() method and change the code so it will look like the following code:
//The following constants must match tokens defined in Sitecore
const string TOKEN_PRODUCT_DETAIL = "%Product Detail%";

private List GetSampleData()
{
var list = new List();
list.Add(new NameValueCollection { { TOKEN_PRODUCT_DETAIL, "product1" } });
list.Add(new NameValueCollection { { TOKEN_PRODUCT_DETAIL, "product2" } });
list.Add(new NameValueCollection { { TOKEN_PRODUCT_DETAIL, "product3" } });
return list;
}
Now add the DisplayDynamicUrls sublayout to the Layout Details of the products item.
The test
Generate analytics data
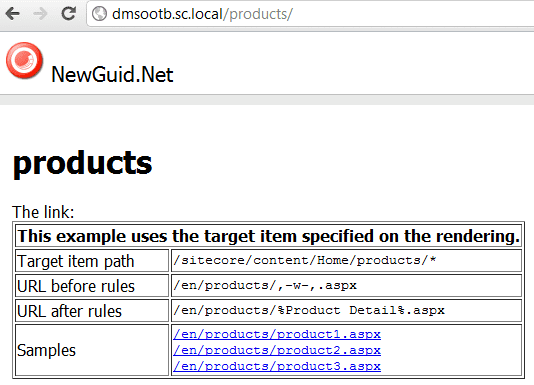
Open a new browser, clear all cookies (I use Chrome Incognito Window) and visit the products item. You can see that the DisplayDynamicUrls sublayout generates Sample links based on the Sample data you configured in the GetSampleData() method.
Click the Sample links and close the browser.
View the Latest Visit Report
Open the Latest Visits report in the Engagement Analytics and select the latest visit. In the bottom of report you can find the visited pages. You can see that Sitecore has logged the wildcard page visits.
The verdict
At this point there is no indication that Wildcards are causing any problems with Sitecore DMS statistics. This is a straight forward simple test without any other complex systems involved, implementing wildcard in combination with DMS on complex systems needs thorough testing before deployment. Consider creating a Proof of Concept before starting to developt your sollution.
Please leave a comment if you have experience with Wildcards and DMS in a more complex scenario.
Tired of switching between the Master and Core database during development? Making the mistake of making changes on the wrong database? Install the Customized Startbar Module.
This module will do multiple things, but the main two things that I really like are:
You can add buttons to the Quicklaunch bar.
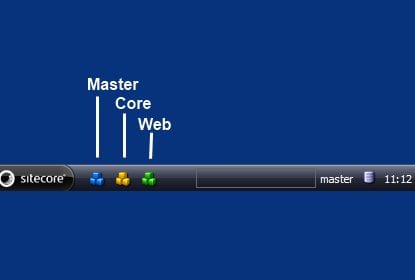
Add the database name next to the database icon (bottom right)
A good example of the use of the customized start bar is a startbar with Quick action buttons that open the Content editor for the master, web and core database.
You can download this CUSTOM customized startbar here.