Tool: Show website tracking and cookie information

With Ghostery you can check cookie and tracking information of a website. This tool can help you to identify cookies and tracking technologies that your website is using. This information can be helpful to determine the strategy for your website to be compliant with the new EU cookie law.

Ghostery is a Google Chrome plugin, after the installation you can configure the default settings for Ghostery.

Now if I open the CNN website in Chrome, I´ll get the following information.

image

This information windows shows that CNN site is using 7 tracking codes and/or cookies. So this is interesting… But there is more you can do, you can also get information about all the different tracking codes, let’s say that I want to know more about NetRatings SiteCensus. To do this I can click the Ghost (with the 7) next to the address bar and click on the more info link next to NetRating SiteCensus.

image

A new tab window will open the website of Ghostery with detailed information about the tracking script. Now I can tell you what NetRating Sitecensus does:

“SiteCensus is a browser-based audience measurement tool that provides in-depth tracking and analysis of your Web site users, site performance and other critical measurement data. Examine your site performance, usage trends, content and product placement, visitor loyalty, search engine performance and visitor behavior.”

This tool can do much more than this, so go download Ghostery and check-out which tracking technology your site is using.

DailyTip: Enable Personalization section in Sitecore 6.5

In Sitecore you can personalize your website with conditions and actions using the Rules Engine (so called Conditional Rendering rules).  In Sitecore 6.5 the interface for defining conditional rendering rules is integrated in to the page-editor, this way it´s easier for the marketeer to create and maintain pesonalization rules.

But as a developer you want to create predefined rules and activate them on the template standard values, the same way personalisation was working in Sitecore 6.4. This is still posible with 6.5 only by default the Personalisation section of the presentation component properties is hidden in Sitecore 6.5.

The following steps will enable the Personalisation section in the Presentation Component Properties dialog window.

Open the Content Editor, press the Sitecore Logo button on the top left and select Application Options.

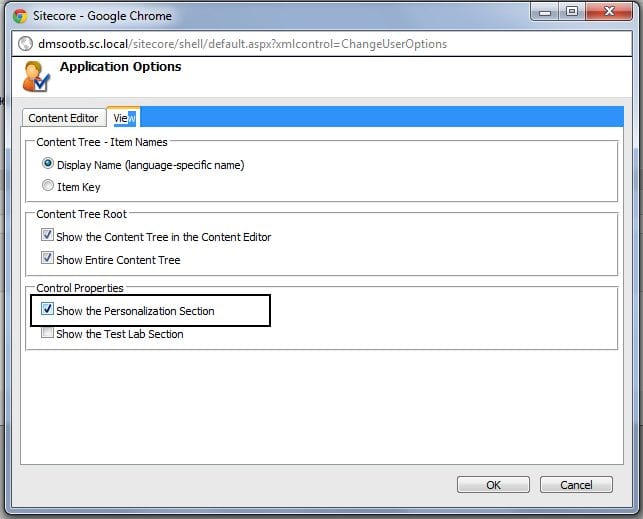
In the Application Options dialog window go to the View tab. Underneath the Control Properties section, tick the checkbox Show Personalization Section and press Ok.

That´s it! The Personalization Section will be visible again.


Tested: Sitecore Wildcards and DMS statistics

With this test we want to check what Sitecore DMS does with Wildcards. How are Wildcard URL’s and shown on the Analytics Reports?

Wildcard items in Sitecore are a convenient way to handle dynamic URLs. They let you pass data through the URL instead of relying on query string values that are appended to the URL. More information about the Wildcards and a introduction to the Wildcard Shared Source Module can be found in this article (written by Adam Conn).

Creating a testing environment

For this testing environment I’ve installed the shared source Wildcard module. After installing the module I opened the Content Editor and created a ‘products’ item, underneath the products item I created a wildcard item (*).

image

Configure the Wildcard Module

Go to /sitecore/system/Modules/Wildcards/. Create a new token called ‘Product Detail’ in the Tokens folder. And create the a new route called ‘Product Route’ within the Routes folder. In the Product Route item add the Wildcard item (*) to the Items field and define the rule in the Rules field.

image

The Wildcard module comes with two Sublayouts; DisplayDynamicUrls and DisplayTokenValues. For this test we are going to use the DisplayDynamicUrls sublayout. We need to alter the GetSampleData() method in DisplayDynamicUrls.ascx.cs. Open the DisplayDynamicUrls.ascx.cs and navigate to the GetSampleData() method and change the code so it will look like the following code:


//The following constants must match tokens defined in Sitecore
const string TOKEN_PRODUCT_DETAIL = "%Product Detail%";

private List GetSampleData()
{
var list = new List();
list.Add(new NameValueCollection { { TOKEN_PRODUCT_DETAIL, "product1" } });
list.Add(new NameValueCollection { { TOKEN_PRODUCT_DETAIL, "product2" } });
list.Add(new NameValueCollection { { TOKEN_PRODUCT_DETAIL, "product3" } });
return list;
}


Now add the DisplayDynamicUrls sublayout to the Layout Details of the products item.

The test

Generate analytics data

Open a new browser, clear all cookies (I use Chrome Incognito Window) and visit the products item. You can see that the DisplayDynamicUrls sublayout generates Sample links based on the Sample data you configured in the GetSampleData() method.

image

Click the Sample links and close the browser.

View the Latest Visit Report

Open the Latest Visits report in the Engagement Analytics and select the latest visit. In the bottom of report you can find the visited pages. You can see that Sitecore has logged the wildcard page visits.

image

The verdict

At this point there is no indication that Wildcards are causing any problems with Sitecore DMS statistics. This is a straight forward simple test without any other complex systems involved, implementing wildcard in combination with DMS on complex systems needs thorough testing before deployment. Consider creating a Proof of Concept before starting to developt your sollution.

Please leave a comment if you have experience with Wildcards and DMS in a more complex scenario.

Daily Tip: Use the Customized Startbar module

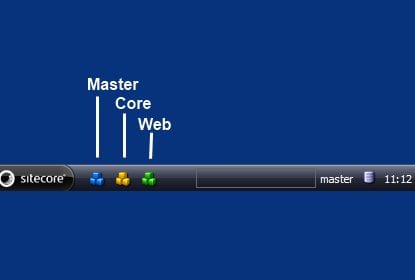
Tired of switching between the Master and Core database during development? Making the mistake of making changes on the wrong database? Install the Customized Startbar Module.

This module will do multiple things, but the main two things that I really like are:

  • You can add buttons to the Quicklaunch bar.
  • Add the database name next to the database icon (bottom right)

The startbar before installation

The startbar after installation

image image

You can download the Customized Startbar module from trac:
http://trac.sitecore.net/CustomizedStartbar/ (Thanks to Alistair Deneys for this module.)

A good example of the use of the customized start bar is a startbar with Quick action buttons that open the Content editor for the master, web and core database.

image

You can download this CUSTOM customized startbar here.

Happy developing!

Daily Tip: Add icons to Fieldsections

To make thinks easier for the business-users you can use Icons for templates. This is a great way to make the business-user recognize the different types of content they can create. But did you know you can also use icons for your Fieldsections?

Set Icon with the webinterface

You can set icons for Fieldsections the same way as you do for your templates. Just open the content editor, expand a template and underneath a template you will find all your FieldSections. Select a field section and set the icon!`

For example. Let’s say we have a template called Sample Item with a Fieldsection Page Title and Text.
If you expand Sample Item Template you can see that there is a Item named Page Title and Text this is the Template Section defined in the Template builder.

Sitecore Template Icon

Select the Page Title and Text item and assign a icon (Configure –> Appearance –> Icon). That’s it. Now create a new Item based on the template and see the result.

Sitecore fieldtype item content editor

Try doing this on your templates. It’s so easy and it will make the Content Editor more attractive for your business-user. Feel free to add comments of questions below.

Update: Set Icon with Sitecore Rocks

You can also set the Template Section Icon with Sitecore Rocks. Expand the template in the Sitecore Explorer and right click the Template Section. Go to Tasks, Set Icon and select the Icon.  (Thanks to @kayeeNL for his Tweet about setting the icon with Rocks)

image

If you want more information about Sitecore Rocks please watch the (Dutch) webinar I gave about Sitecore Rocks.

Step 3: Create the outgoing link report

This article is part 3 of Sitecore How To: Track Exteral links with DMS series. Before starting with this step you need to be finished with Step 2. Otherwise you don’t have any report data.

Show the outgoing links in a report

The easiest way to generate a report is find a report that matches your needs, copy the report and change the datasource and layout. For this POC the Slow Pages report matches 80% of my requirements, so let’s use the Slow Pages report as a base for our new report.

Download the External Links per Page.mrt Report

You can download the External Links per Page report. Unpack the zip file and save .mrt the file in the folder /sitecore/shell/Applications/AnalyticsReports.

This report is a customized version of the slow pages report. For more information about report designing you can read the Report Designer Cookbook

Copy the Slow Pages Report SQL Query Item

Duplicate the slow pages Report SQL Query item (/sitecore/system/Settings/Analytics/Reports SQL Queries/Slow Pages) and name the Item External Links per Page.

Delete the SQL query in the SQL server field and add the following SQL query.


select    top 100
Pages.Url,
PageEvents.Data as Link,
COUNT(*) as Clicks
from
Pages,
PageEvents,
Visits,
PageEventDefinitions
where
Pages.VisitId = Visits.VisitId
AND Pages.PageId = PageEvents.PageId
AND PageEventDefinitions.PageEventDefinitionId = PageEvents.PageEventDefinitionId
AND PageEventDefinitions.Name = 'External Link'
AND Visits.StartDateTime BETWEEN @StartDate AND @EndDate
group by
Pages.Url, PageEvents.Data
order by
Clicks desc


This query will return all outgoing clicks from every page.

Copy the Slow Pages Report Item

Open the content editor and duplicate the Slow Pages Report item located at: /sitecore/system/Settings/Analytics/Reports/Reports/Site Health/Slow Pages

Name the duplicated report External Links per Page.

In the External Links per Page item change the Filename to External Links per Page.mrt and change the Report Title field.

In the Queries section. For Failure select the External Links per Page Report SQL Query item.


Sitecore DMS Queries
Note: You might want to rename the datasource name Failure to something like Datasource. If you do this you need to do a search and replace within the .mrt file.

Test you report

Login to the Sitecore Desktop and open the Engagement Analytics. Underneath the Site Health node you will find the External Links per Page report.


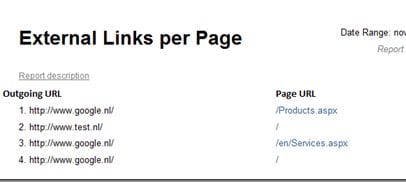
In this report we can see that we generated three clicks from our products page to Google.nl and two clicks from our homepage to test.nl.

This report is only a example. You can create all kind of reports all based on the event table in the Analytics Database.

Webinar: Sitecore and Continuous Integration

webinar sitecore continuous integration

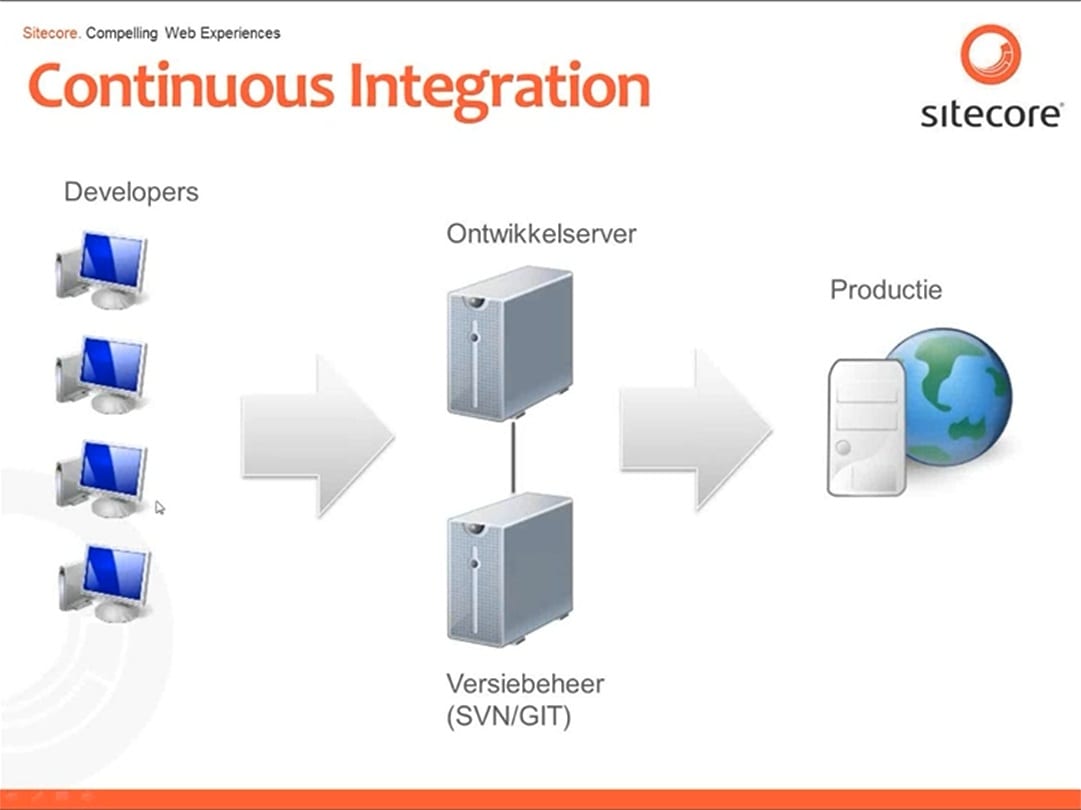
Today Lucas Bol gave the first Dutch Sitecore guest Webinar. The subject of this webinar was continuous integration with Sitecore based on open source products. The video is in Dutch and posted below.

[youtube]http://www.youtube.com/watch?v=Nd__rUJtLq0[/youtube]

In the next few days Lucas will post his documentation and explanation of the webinar in English. Follow us on Twitter @new_guid or subscribe to our RSS feed if you want an update when this is posted.